Questions and Answers
How do I calibrate the RAS bow sight?

STEP 1After mounting to the bow, you must use the bracket vertical and horizontal adjustments to align the target markers (vertical) on your new sight. Turn ON the sight by pushing any button on the range trigger or Short Pressing B1. The OLED will read SET PINS. Long press B2 to enable the beam LED and the screen will say ALIGN. Press B1 and B2 to adjust the 0 pin up or down (where you want the closest range pin to start)NOTE the pin# for future reference.
Push any button to turn sight ON for Zeroing sight. Zero sight by adjusting elevation/windage on the sight bracket until satisfied it is on vertical and center.
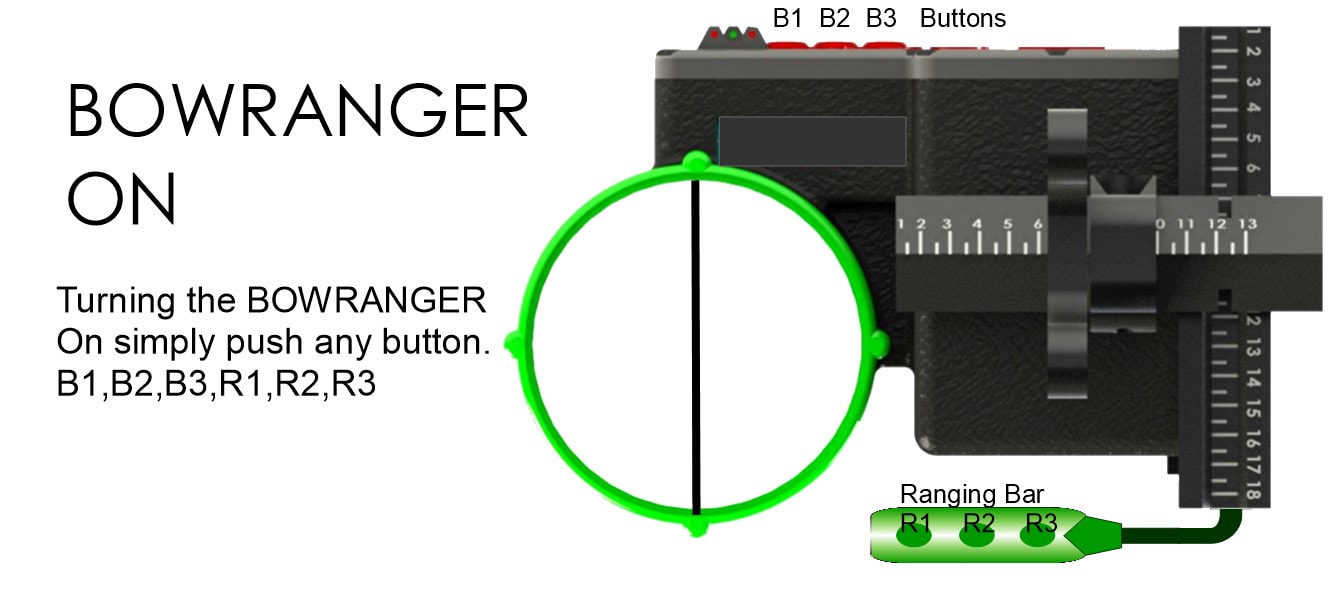
Press any button
|

SP B3 Short press Button 3
|
Long press LP B2 to activate the Alignment mode (Red Laser)
Use target at about 10-12 yards for laser alignment.
Use target at about 10-12 yards for laser alignment.
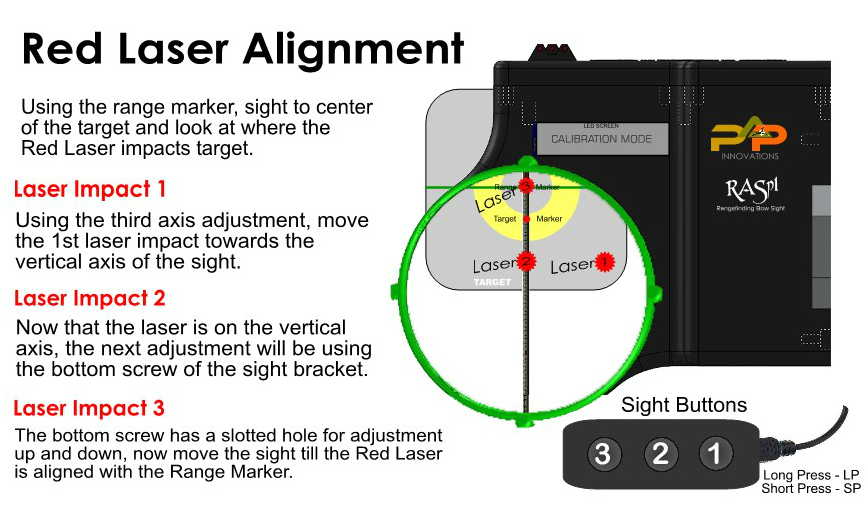
Long press LP button 1 to exit Alignment mode (Turn off Red Laser)
Long press LP button 3 to enter Calibration mode!
Long press LP button 3 to enter Calibration mode!
CALIBRATION STEPS (Initial Set-up)
PREVIEW OF CALIBRATION PROCESS
Turn the RASp1 Bow Sight OFF by Short Pressing SP button 3.
To calibrate the RAS bow sight is very similar to sighting in with traditional pins.
Pressing B3 for 3 seconds the sight will go into 'CALIBRATING' mode which will ask to SET PINS and will show ARROW 1 PIN 1 ? This range will be at around 15 to 20 yards. Aim the sight to the target and range. The sight will then display the range and give two options to either store this range or range again if the target was missed by the range finder. If range is correct LP B1 and the pin will be saved. Aim and shoot an arrow to the target by aiming with illuminated Green LED. If the point of impact was low adjust the LED's by pressing B2 to move down or B3 to move up. For each press of the B2 and B3 button the LED's will either go up or down. If the point of impact was high press B3 once or twice and shoot another arrow. Repeat this process until the arrow is on target. When the arrow is on target press B1 for 3 seconds 'RANGE 1' PIN 1 will be stored. The minimum number of RANGES saved is 3 and the maximum 10.
The next RANGE will be ARROW 1 PIN 2 and this will be at around 30 yards. Repeat above steps for 'RANGE 2' until 'RANGE 5' is calibrated.
Example of range calibration if maximum shooting distance is 70 yards and only 5 RANGES saved.
‘RANGE 1’ will be at around 15-20 yards
‘RANGE 2’ will be at around 25-30 yards
‘RANGE 3’ will be at around 40-50 yards
‘RANGE 4’ will be at around 55-57 yards
‘RANGE 5’ will be at around 65-70 yards (This will be the maximum shooting range for this specific bow/arrow)
Remember that 'RANGE 5' must be at the maximum range for where you will shoot comfortably in this example. The more Ranges you set, the more accurate your Target Markers will be. You can do a maximum out to RANGE 10. (If you shoot a really fast bow, the PINS saved at shorter ranges will be tight together. You may want to start your first PIN out at 25-30 yards and move out 5-10 yards for each of your next PINS)
10 different arrow types can be calibrated into your P.A.P. Bow Hunting Sight example: Blunt point for practice, 2 broad heads for hunting at different came species and an arrow for foaling or 420gr, 600gr etc.
NEVER SHOOT OVER MAXIMUM CALIBRATED DISTANCE AS THIS WILL RESULT IN POSSIBLE MISSED SHOTS.
When your P.A.P. Bow Hunting Sight is calibrated you are ready to go hunting.